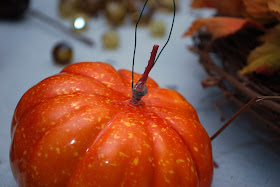
The warm colors of fall never fail to get me in a decorating mood. I sat down last Saturday and made this wreath. So of course, I’m gonna blog about it.
All of my supplies came from our new Hobby Lobby. Obviously choose what you like this is just my
“recipe”. Why I love it: lots of
texture, pretty fall colors, and the burlap keeps it from being to garish with
the glittery pumpkins.
Supplies:
24” grape vine wreath
Various floral picks – pumpkins and acorns of varying
sizes and finishes
Fall spray of birch leaves; I liked how fluffy
they looked
Four inch wide burlap wired ribbon
Large plastic beads
Tools:
Florist wire
Florist wire
Scissors
Heavy duty wire cutters
Hot glue gun – the perfect companion to any craft
project
The first thing I like to do is decide how I want
to orient the wreath and mark the top with a piece of ribbon. I
go this idea from my mom, and it always helps me with the lay out.
Next I just play with stuff until I get it
kinda where I want it and take a quick picture.
It doesn’t have to be great but just enough that you can get it back in
the same general lay out.
For this
wreath I had to cut the birch spray into two sections for the look I wanted. Using florist wire attach the “branches”. Then using the hot glue gun I oriented the
branches along the wreath, disguising the glue spots by sticking a leaf on top
of them before they dried.
Next is the
burlap ribbon. I played with it until I thought it looked good then stuck the
florist wire through the holes and wired it to the wreath. I saved some of the final securing until
after I attached the other pretties but I’ll get to that.
Next were the floral picks. For some of them I cut the pick short and
glued the florist wire in its place.
I
started placing the picks along the wreath, gluing and wiring as I went, all while
using the picture I had taken as a road map.
The next part was probably my favorite.
I get ticked to use something for other than its intended purpose, and
have it turn out cool. Using the florist
wire I turned the large plastic beads I found into another florist pick of
sorts. I grouped them together and
attached them all over the wreath.
Some
were between the pumpkins and acorns, others nestled amongst the leaves.
I decided I liked where the burlap ribbon was,
made a few more folds and secured it with bits of hot glue hidden
in the folds. Finally I wrapped some of
the same ribbon around the top, securing with glue and called it finished. I hope you enjoyed the blog post and get
inspired.


No comments:
Post a Comment
Please know this blog is like having you as a guest in my home. Therefore, don't say anything on here you wouldn't say at my dinner table!